Pages

Monday, 29 August 2011

Lavender wands

For some reason recently I remembered a craft I did a very long time ago when I was a Girl Guide leader,  making woven lavender pomanders (which I have since discovered are called wands). The lavender in my garden is past it's best although there are some new flowers coming, but I managed to find a handful of useable stems (somewhere in between about to bloom and gone to seed) and had a go at making some wands. They turned out quite well for a craft I last made about ten years ago.

I now need to work out what I can do with these. It would be nice to turn them into gifts for people, perhaps combining them with a pack of greetings cards I created some time ago with photos of lavender and bubbles.
Satisfying simple craft for a Bank Holiday Monday. Thinking I might take it up a level and have a go at making lavender baskets as these look so pretty ...
Lavender baskets from a post by Tongue in Cheek
© 2011 Nicola Noble

Friday, 29 July 2011

Tumble Tots cake

Both children have actively taken part and very much enjoyed an activity called Tumble Tots over the past few years and Helen, the lady who has been the life and soul of our local Tumble Tots for the past 20 years, took early retirement today. I couldn't let it pass without contributing a thank you cake to the farewell party.

I was originally going to do a Mr Tumble Tot shaped cake but found out someone had done something similar for her last year so I thought I would go one step further and create a mini tumble tots activity session on the top. The most ambitious part was creating two ladders which turned out okay but which proved extremely difficult to prop up against each other on the cake - in the end I made a triangular soft slide that sat between the two ladders and supported them.

I created a selection of other "equipment" and also had a go at making a mini Helen and a mini Mr Tumble Tot. He turned out to look more like the "real" thing than Helen did (she originated from Hong Kong but you would never guess that from the mini figure) but I was still pleased with my first ever person!


Helen's pose is truly representative of her: part of the TT "warm up" is asking the children if they can touch their nose with their toes and Helen was exceedingly agile and could easily do this - hence the mini Helen's pose!

I created the ladders by using my extruder to produce a fat string and then feeding dried spaghetti into the middle of the string and rolling it to smooth it out again. I made two long ones for each ladder and several shorter ones with spaghetti sticking out either end which I then pushed into the long ones to create the rungs. I then had to be patient and let the fondant completely dry out so that they were firm enough to stand up.

It was a fun and novel cake to do and I had lots of lovely comments from the other people, not just about the decoration but the quality of the cake too which was really nice to hear. I think I am going to have cake withdrawal symptoms as I have no other cakes in the pipeline. Perhaps that's a good thing as it is the summer holidays and I can focus on the children and then in September I plan to start working my way through various cake books trying lots of new recipes and experimenting ...


© 2011 Nicola Noble

Wednesday, 20 July 2011

Christening cake

I have just finished my first christening cake and, even better, someone is going to pay me for it! I played around with various ideas from a teddy bears' picnic to a train on a track and settled on some toy toppers - a teddy bear, a train and some building blocks. The colour theme was blue and purple on white. I used purple to add some contrast so that it wasn't too wishy-washy with just pale blue.
I made the teddy in the same way as for my recent teddy bears' picnic cupcakes, but instead of flower paws I added purple stars to coordinate him with the other toppers.
The train proved a little harder - I really wasn't happy with my first attempt but then found a great shape thanks to The Cake Journal. The only thing I changed was using fondant buttons for the wheels (the client really liked this detail)

The building blocks were much harder. I started off making them too big and had to cut them right down in size. It was hard to get a cube shape but I persevered using my cake smoother and the flat surface of the work mat until they looked reasonable. It was also quite hard getting them all the same size. I have some letter embossers so used these to add some detail. If I was to do these again, I would decide on the arrangement of the blocks first and then imprint the letters as I found that, since I randomly imprinted the letters, they weren't facing the right way once put together. I was able to cover this "mistake" by making one side of each block purple and adding a blue star. This also helped coordinate the blocks with the other toppers so it worked out okay in the end.
I finished off the toppers with some lustre. I mixed snowflake lustre dust with a little bit of vodka and painted it onto the purple and black elements of the toppers. Doing it this way makes the lustre more intense than just brushing the dust onto the fondant. The vodka evaporates which means the fondant doesn't get soggy.

The cake was a 9.5" victoria sponge with lemon zest and lemon buttercream. My two tins were slightly mismatched so I had to do a little cutting to balance the outer edges of the two layers and a little levelling on the tops of the sponges to make the cake flat. My last decorated sponge had a middle bulge showing through the fondant icing but with research I realised that the buttercream had been too soft so this time I made the buttercream reasonably firm for the middle and then softened it with more lemon juice to dirty coat the sides and top (dirty coat is a thin layer of buttercream that "traps" the crumbs). I put the cake in the fridge while I did the school pickup and later added a thicker layer of buttercream to the top and sides (no crumbs to fight with on this layer!) and then covered the cake in white fondant.

The cake was placed off-centre on a board so the name could be placed at the front of the board. I had covered this with white fondant last week (to allow it to harden so that it didn't mark when the cake was put on) and glued a blue ribbon to the edge of the cake board.

I recently watched a tutorial on YouTube where the person used a pastry/pizza cutter to trim the excess fondant so I thought I'd give this a go. I can see with some practice that this will work very well and for a first attempt it wasn't too bad - just a little high in a couple of places. I covered these slight uneven edges with a blue fondant ribbon.

The fondant ribbon was hard to do. I bought a Wilton ribbon cutter when I was in the States recently and I think it will take a bit of practice for this too. The "cutters" don't cut as cleanly as I would like but overall it gives a nice effect. The only really hard thing was rolling a piece of fondant long enough to go round the whole cake in one piece and keeping a consistent thickness along the length. It took about three attempts but I got there ...

Finally, to finish the cake I added the little boy's name. I used this as an excuse to buy some letter cutters. Again these are going to take some practice but I think that they turned out well. They are slightly bigger than I was expecting but I think they look good on this cake.

All that is left to do now for the Christening is to make some cupcakes with blue and purple buttercream swirls.

© 2011 Nicola Noble

Wednesday, 6 July 2011

Teddy bears' picnic


Our road had it's first street party on Saturday and there was a cake competition. I wasn't planning to enter as we only got back from holiday on the Saturday before but Jason kept telling me I should and on Wednesday night I had a flash of inspiration as to what I could do and went for it.

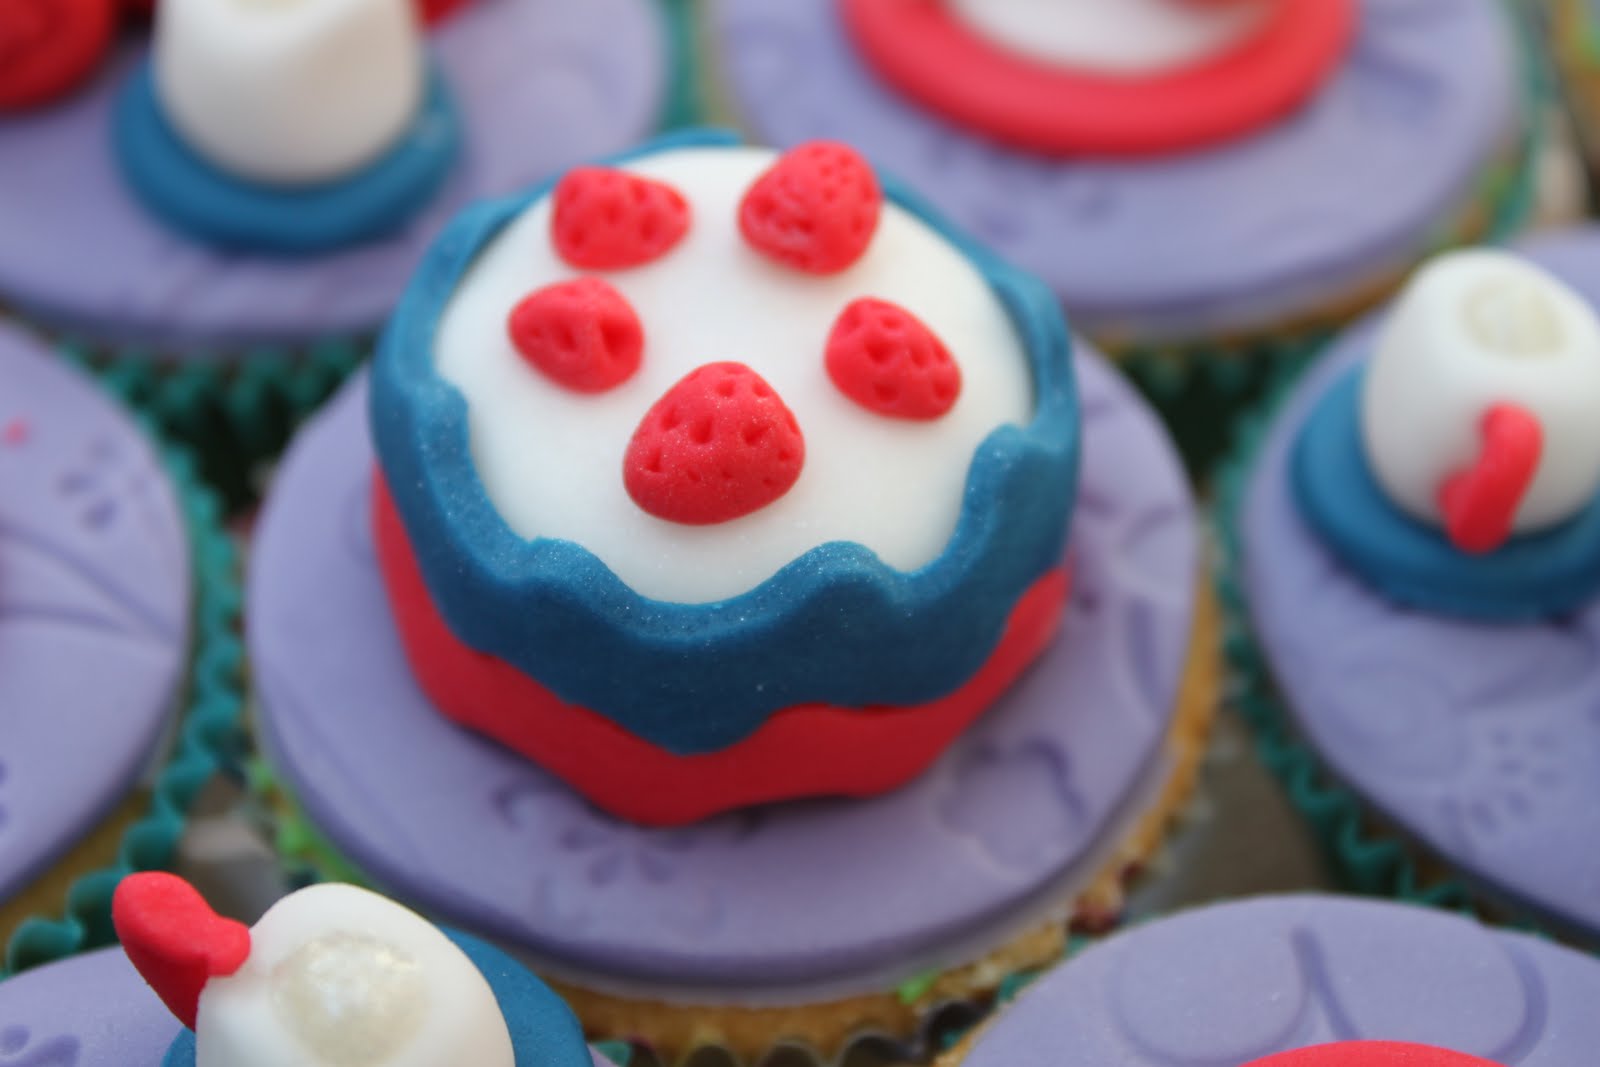
I made a teddy bears' picnic on cupcakes, so each cupcake made up a part of the whole "picture'. I decided to colour theme it red, white and blue as I had these colours already (and added a purple rug and green grass) and overall it came out really well. The only thing to let me down were the cupcakes themselves.

I haven't made enough cupcakes to find a recipe I like so I opted for one from a cupcake book I was given and it was far too dry. I slightly overcooked the outer cupcakes which didn't help so the ones the competition judges tasted were far from the best. Shame to say I didn't win but rightly so, if I'm honest. Something to work on for next year's cake!

I started with the fondant bears and then made the strawberry cake, plates and cups. The cups were very hard and next time (!) I will try adding some Tylose/CMC powder to strengthen the fondant and make it easier to work with when modelling the paste. I decided the plates needed some food on so I made a little jam sandwich by rolling two thin layers of beige fondant and one layer red then sandwiching them together and cutting out triangles. I made a banana, orange and apple and used a little bit of red liquid food colouring with a paint brush to add some colour to the apple and some shading to the banana. I also filled the tea cups with some silver sparkly Barbie writing icing.
I made a big purple picnic mat which I embossed with a flower pattern mat and then cut out circles for each of the cupcakes. I piped grass on the outer cupcakes using my grass piping nozzle (note to self: when using up "old" buttercream make sure it doesn't have lemon zest in as it doesn't go through the nozzle!) and then finished off the whole scene with some toadstools, flowers and obligatory lustre dust and sparkle!

PS. Can you tell that the red teddy was my favourite?

© 2011 Nicola Noble


Tuesday, 31 May 2011

Jelly Belly jelly bean rainbow cake

My husband is addicted to Jelly Belly jelly beans so this year I decided to make him a gluten free jelly bean birthday cake.

I found a gluten free cake mix in the local supermarket which I decided to try and it was amazingly easy, although sadly didn't taste as good as I had hoped. I got two packets and made three 6" sponges and six cupcakes. I cut up a random selection of Jelly Belly bean Belly Flops and put these into two of the sponges, creating a jelly bean confetti cake (lots of recipes for this on the web).

The confetti layers sandwiched a plain layer and all were fixed together with strawberry jam and vanilla buttercream. I then coloured some buttercream green for the sides of the cake and some blue for the top. My daughter and I then sorted out a selection of beans the colours of the rainbow and created a rainbow on the top of the cake. Random beans and a jelly bean flower were stuck to the sides of the cake. 

I topped the cupcakes with Betty Crocker chocolate fudge icing and a "sprinkling" of jelly beans.

I even managed to hide the cake from hubby until his birthday and, needless to say, neither the cake or the cupcakes lasted long!

© 2011 Nicola Noble

Friday, 27 May 2011

Handbag-tastic cake


It's my wonderful mother's 70th birthday on Monday, and as she is the one who always helps me with my children's fabulous birthday cakes I felt a home-made special cake was in order.

It was very hard to decide on the design but after playing around with a few ideas I finally settled on a handbag-tastic cake (inspired by a little cake I spotted in Harrods last year).

I covered a large cake board with fondant which I coloured a slightly dusky pink and put a green ribbon around the edge (I had this already). I made the cake triple layer to make it bit more substantial without being huge and covered this with lemon buttercream and white fondant.

I made a selection of handbags, creating five very different bags. The colour theme turned out to be pink, green and purple, mostly dictated by the colours of fondant I already had and the new pink I had coloured up. I think it works well. I used some icing nozzles to pattern some of the bags (the "knitted" bag and the circles on the clutch bag). I also used a new embossing mat for the flowers on the big pink bag, and a modelling tool for the stitching. I decorated some of the bags with cut-out fondant flowers, silver,pink and green edible balls and a fondant button (using a new mould I recently bought from Pretty Witty Cakes) and used my extruder to create a rope handle and a tiny tassel!


I decided I needed to "display" the bags on the cake so made some "marble" pillars to sit them on, mixing white with some of the pink fondant. The marble effect is created by rolling the fondant between the palms of your hand until you get the desired effect.

The buttercream was a little too soft and so the cake is a bit lumpy but I hope it adds to the charm! I decided to tidy the join of the cake to the cake board with a pink fondant rope. This was made using my extruder and the trefoil disc which creates a trefoil shape roll which then needs to be twisted to get the rope effect.

I decided to be kind and not mention 70 anywhere on the cake, so I have cut "Happy Special Birthday" in the three colours I used and added sparkle powder to them. I also moulded a selection of buttons in the three colours and glued them to the sides of the cake to add some interest.


Now we just have to get it to the restaurant on Monday and hope that she likes it!

© 2011 Nicola Noble

Tuesday, 24 May 2011

Easter eggs

I decided to make Easter eggs for family this year rather than buy them and found it all quite addictive.

Many, many years ago I collected coupons and sent off for some egg moulds which I rediscovered at the end of last year. I bought a selection of dark, milk and white chocolate and also some mini honeycomb and fudge pieces.

I wasn't technical in the making of the eggs (ie tempering the chocolate etc) as I worked on the principal that the eggs wouldn't be around long enough to "bloom". I melted the chocolate in the microwave and with a bit of practice I figured out how long to "zap" it for - several short bursts to the point where there were still some chocolate pieces that looked solid but with a bit of gentle shaking they collapsed into the melted chocolate.

I made a selection of all dark eggs (for dairy intolerant hubbie) and milk eggs for others. The fun bit was decorating the eggs. I made some mini piping bags from greaseproof paper and melted the white, milk and dark chocolate in the bags in the microwave. I then cut a small hole in the piping end and had fun making flowers, spots and just drizzling randomly across the eggs. When this had hardened I spooned in the contrasting chocolate for the egg and added either fudge or honeycomb pieces, both of which were delicious. When these had set I then melted a little more chocolate and stuck the two halves together to make the complete egg.

I was very pleased with how they came out ...
© 2011 Nicola Noble