Pages

Showing posts with label fondant flowers. Show all posts

Monday, 7 April 2014

Chocolate party - Alpine village cake

Sophie's 8th birthday party was all about chocolate (see my previous post here). The obvious choice for a cake was an all out choco-tastic creation but no cakes I found online inspired me. I have learnt from previous years that if the cake isn't particularly creative I feel cheated and disassisfied with the end product so I needed to come up with something I could really get my creative teeth in to. Cue Alpine village cake.
cake, alpine village, chocolate, chocolate house
I don't know where this idea sprang from and I couldn't find any similar cakes to what was in my head so I had to build it as I went along. First piece of inspiration came from the Lakeland's fairy tale village moulds and I used this to make chocolate houses. Using milk, dark and white chocolate, I poured melted chocolate into each part of the moulds for mix and match houses. Sadly I didn't do a very good job of tempering the chocolate and all but the dark chocolate rooves bloomed, but actually it didn't notice once all the other decorations were on and the chocolate still tasted good!

I had also collected a selection of chocolate sprinkles, hearts, jazzies, pebbles and other bits along the way which all got put to good use. I ended up baking one rectangular sponge and two 9" circular ones (chocolate sponges of course) and layering them for a staggered mountain slope sort of effect.
cake, alpine village, chocolate, chocolate house

I knew I wanted to a stream across the cake and that idea developed into a babbling mountain stream ending in a lake. I mixed two colours of blue fondant together, but didn't totally mix them so there was some marbling still. This ended up looking fab and I finished off the stream with some sugar sprinkles I had left over from the Octonauts cake I made earlier this year.
cake, alpine village, chocolate, chocolate house
I had the mountain stream coming out of a chocolate pebble and I edged the mountain lake with some more of the chocolate pebbles and some of the small chocolate sprinkles. The finishing touch for the lake was some piping gel (something new for me to play with) which I spread across the lake for a water effect. This worked fantastically and I will definitely be playing with this again another time.
cake, alpine village, chocolate, chocolate house

cake, alpine village, chocolate, chocolate house

cake, alpine village, chocolate, chocolate house
The strange indentations on the picture of the plain green covered cake above were deliberate! They turned into a footpath from the top house, linking it to the house on the mid-levels and I added some orange chocolate Matchmakers to provide some steps for the little chocolate people I added right at the end (sadly no photos of the cake with these little guys on) to get down to the lake and their friends in the bottom house!  
cake, alpine village, chocolate, chocolate house
cake, alpine village, chocolate, chocolate housecake, alpine village, chocolate, chocolate housecake, alpine village, chocolate, chocolate house
The finishing touch was to add literally a hundred plus fondant flowers in lots of bright colours, Sophie's name and a number eight candle placed behind the silver Happy Birthday.
cake, alpine village, chocolate, chocolate house
For the first time Sophie had very definite ideas as to how she wanted the cake but I couldn't really understand or translate some of these into reality. Thankfully, she was very happy with the finished cake so all was good in the Snowballs house.

© 2014 Nicola Noble: Please observe the rules of copyright and blog etiquette. If you use my ideas or images, please link back to my blog. And do let me know - I'd love to take a look.

Saturday, 18 February 2012

Mini-cakes

It's my mother-in-law's birthday on Sunday and I wanted to make a birthday cake for her. But as they are emigrating to Australia in two weeks time it really needed to be a small cake - enough for everyone to have a slice on the day and be gone.
I had an idea of what I wanted it to look like (almost one of the first images of a cake I ever downloaded from the internet and virtually my first pin in Pinterest) and decided to bake the sponge (gluten free so Jase could share it) in small pyrex ramekins, rather than bake a larger cake which would have to be cut to size after baking. A small victoria sponge mix (4oz each of flour, margarine and sugar plus 2 eggs) filled four ramekins perfectly. The only disadvantage of using the ramekins was that they flare outwards slightly, so I did need to trim the baked sponges to be straight-edged, but that was a minor point for something that actually worked very well.

The sponges were quite tall, so I used two cakes and sliced them in half horizontally, creating four layers. This did make quite a tall cake which proved tricky when it came to covering with fondant. The height of the cake (in relation to the diameter of the top) meant that the fondant hung in pleats around the bottom when I placed it on and it started cracking towards the bottom of the cake when I began to smooth it. The first attempt cracked so much that I decided to lift it off and start again with another piece. This worked much better and although it still cracked a little, I was able to cover these cracks with the pink fondant bow around the bottom of the cake.

I was pleased with how the flower on the top came out, although I should have left the layers to dry slightly longer as the petals started breaking away from the middle part of the flower. This didn't show when it was all put together and I was pleased with how the petal edged looked after I had "frilled" them.

I had two other sponges left so decided to make one more (smaller) cake and the decoration for this was also inspired by a Pinterest pin (two pins in one go - my pin to make ratio must be quite high!)

This one has a dahlia type flower on the top made from cutting mini marshmallows in half diagonally and dipping in edible glitter. The glitter only sticks the inside cut part, and the result is a pretty, glittery petal. I then put a blob of buttercream on the top (I wasn't going to make royal icing just for that) and placed the "petals" in circles, starting at the outside and working my way in. Again, such a simple but very pretty cake.

And for those of you keeping count (I only used three of the four sponges I baked), I filled the last sponge with lemon curd and buttercream and we all shared it for tea!

© 2012 Nicola Noble: Please observe the rules of copyright and blog etiquette. If you use my ideas or images, please link back to my blog. And do let me know - I'd love to take a look.

Wednesday, 6 July 2011

Teddy bears' picnic


Our road had it's first street party on Saturday and there was a cake competition. I wasn't planning to enter as we only got back from holiday on the Saturday before but Jason kept telling me I should and on Wednesday night I had a flash of inspiration as to what I could do and went for it.

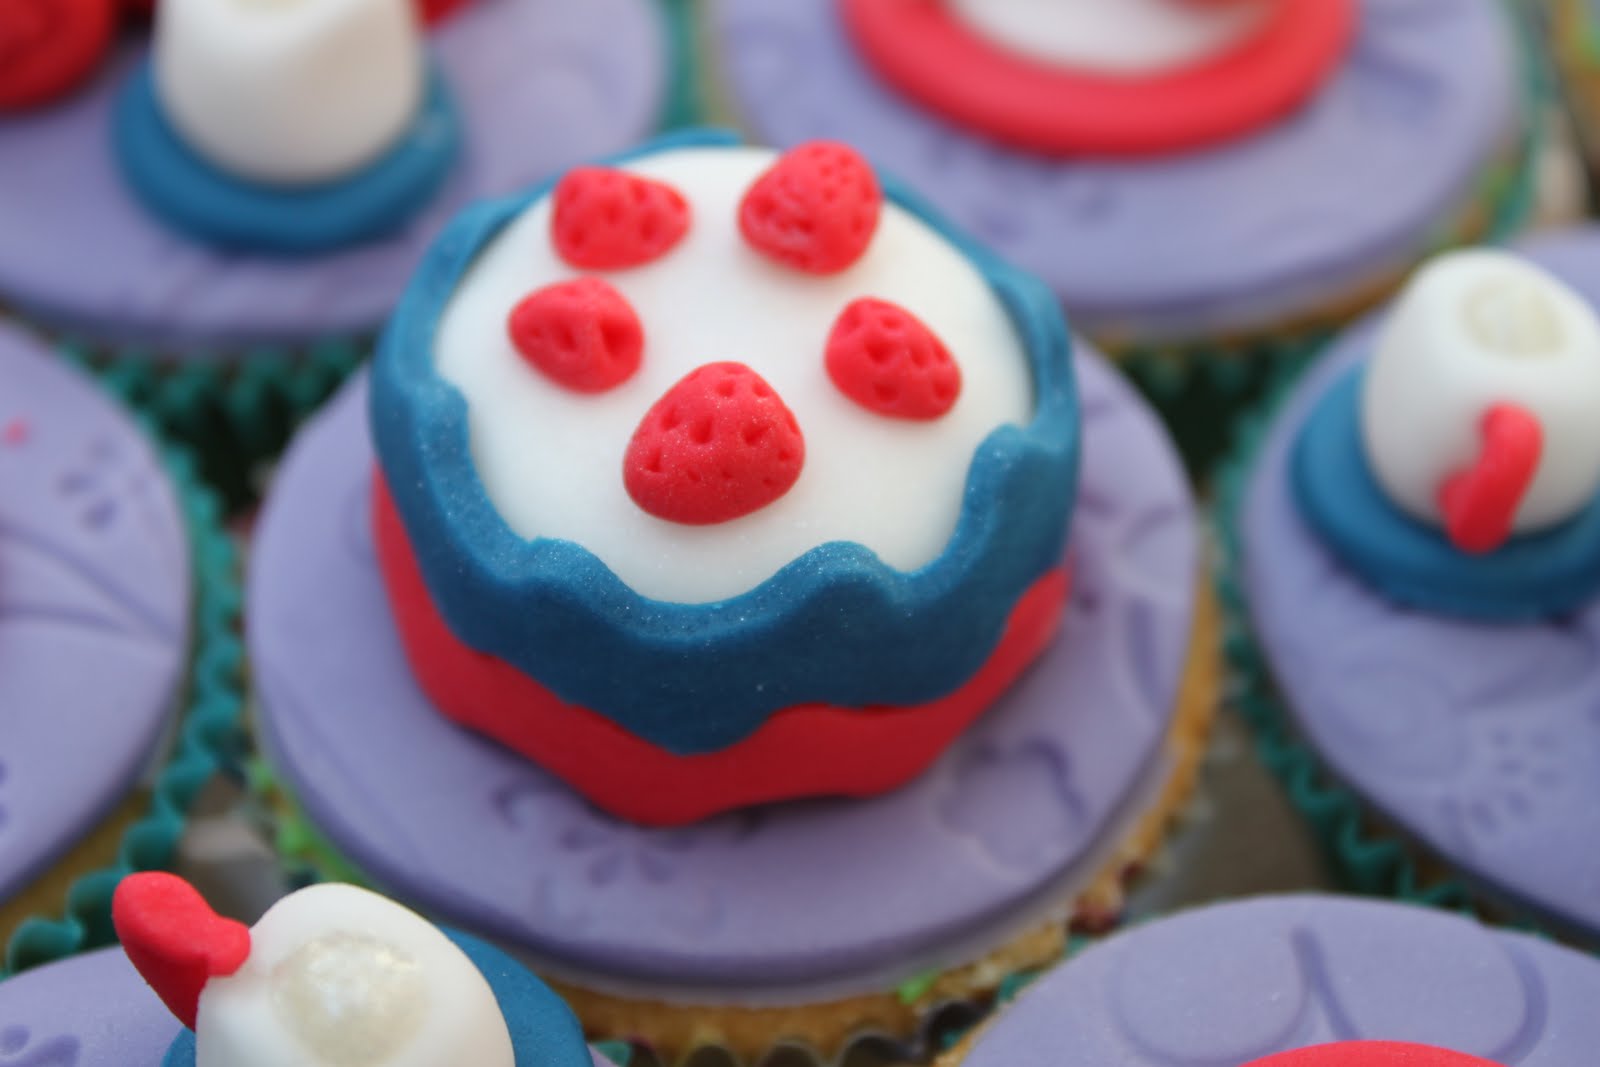
I made a teddy bears' picnic on cupcakes, so each cupcake made up a part of the whole "picture'. I decided to colour theme it red, white and blue as I had these colours already (and added a purple rug and green grass) and overall it came out really well. The only thing to let me down were the cupcakes themselves.

I haven't made enough cupcakes to find a recipe I like so I opted for one from a cupcake book I was given and it was far too dry. I slightly overcooked the outer cupcakes which didn't help so the ones the competition judges tasted were far from the best. Shame to say I didn't win but rightly so, if I'm honest. Something to work on for next year's cake!

I started with the fondant bears and then made the strawberry cake, plates and cups. The cups were very hard and next time (!) I will try adding some Tylose/CMC powder to strengthen the fondant and make it easier to work with when modelling the paste. I decided the plates needed some food on so I made a little jam sandwich by rolling two thin layers of beige fondant and one layer red then sandwiching them together and cutting out triangles. I made a banana, orange and apple and used a little bit of red liquid food colouring with a paint brush to add some colour to the apple and some shading to the banana. I also filled the tea cups with some silver sparkly Barbie writing icing.
I made a big purple picnic mat which I embossed with a flower pattern mat and then cut out circles for each of the cupcakes. I piped grass on the outer cupcakes using my grass piping nozzle (note to self: when using up "old" buttercream make sure it doesn't have lemon zest in as it doesn't go through the nozzle!) and then finished off the whole scene with some toadstools, flowers and obligatory lustre dust and sparkle!

PS. Can you tell that the red teddy was my favourite?

© 2011 Nicola Noble


Friday, 27 May 2011

Handbag-tastic cake


It's my wonderful mother's 70th birthday on Monday, and as she is the one who always helps me with my children's fabulous birthday cakes I felt a home-made special cake was in order.

It was very hard to decide on the design but after playing around with a few ideas I finally settled on a handbag-tastic cake (inspired by a little cake I spotted in Harrods last year).

I covered a large cake board with fondant which I coloured a slightly dusky pink and put a green ribbon around the edge (I had this already). I made the cake triple layer to make it bit more substantial without being huge and covered this with lemon buttercream and white fondant.

I made a selection of handbags, creating five very different bags. The colour theme turned out to be pink, green and purple, mostly dictated by the colours of fondant I already had and the new pink I had coloured up. I think it works well. I used some icing nozzles to pattern some of the bags (the "knitted" bag and the circles on the clutch bag). I also used a new embossing mat for the flowers on the big pink bag, and a modelling tool for the stitching. I decorated some of the bags with cut-out fondant flowers, silver,pink and green edible balls and a fondant button (using a new mould I recently bought from Pretty Witty Cakes) and used my extruder to create a rope handle and a tiny tassel!


I decided I needed to "display" the bags on the cake so made some "marble" pillars to sit them on, mixing white with some of the pink fondant. The marble effect is created by rolling the fondant between the palms of your hand until you get the desired effect.

The buttercream was a little too soft and so the cake is a bit lumpy but I hope it adds to the charm! I decided to tidy the join of the cake to the cake board with a pink fondant rope. This was made using my extruder and the trefoil disc which creates a trefoil shape roll which then needs to be twisted to get the rope effect.

I decided to be kind and not mention 70 anywhere on the cake, so I have cut "Happy Special Birthday" in the three colours I used and added sparkle powder to them. I also moulded a selection of buttons in the three colours and glued them to the sides of the cake to add some interest.


Now we just have to get it to the restaurant on Monday and hope that she likes it!

© 2011 Nicola Noble

Monday, 21 March 2011

Fairy birthday - the cakes

And so to the cake(s). My inspiration for the whole party was a fairy toadstool cake in my cake bible (Debbie Brown 50 Easy Party Cakes) The fairy toadstool in the book was very pink and I decided (and Sophie agreed) to do hers with a red top. I baked two madeira cakes in 2 litre pudding bowls and then carved them a little to give them a less rounded shape. I'm not a great fan of madeira cake, I much prefer a victoria sponge but for this I needed the denser cake so it would cook properly in the middle without burning.

I covered the cake board in green fondant on the day that I was making the cake which didn't give it time to dry out and harden. This meant that I kept catching it so I ended up covering a few of the worst marks with flowers and toadstools etc.

The base of the toadstool cake was covered in white fondant and the top in red. I had to carve quite a lot off the top cake to give a more toadstool type appearance, which meant that it was much smaller by the end. It was very tricky to wrap the red around the top and tuck it under but with my cake-making accomplice (my mum) it turned out reasonably smooth and only a few folds along the bottom curve (which didn't look out of place for a toadstool). I added white spots in three different sizes and smoothed the edges of the circles with my finger to thin the fondant out once in place on the red top. Since the cake was going to be moved to the party venue, I fixed the top of the toadstool to the base by putting six wooden skewers into the bottom cake with a couple of centimetres sticking out the top and pushing the top cake onto these.

Then came the fun bit where I added a door, window and flowers to the toadstool and little toadstools, flowers candles and Tinkerbell to the board. I created a small hillock to stand the flower candles in and then piped "grass" in green butter icing around the hillock, back of the cake and toadstools. The grass also kept Tinkerbell in place and covered the blue base of the figurine. I had contemplated making a fondant Tinkerbell but my first attempt was so hideous that I quickly abandoned that idea!


I had been given some cupcake stands for my birthday last year and I wanted an opportunity to use these, so I also made some cupcakes. I made two types: a chocolate cupcake with piped buttercream grass and a little fondant toadstool; and a vanilla cupcake with a cream butter swirl and pair of Tinkerbell shoes. 

The toadstools were so simple to make - a ball of white fondant flattened on the bottom and slightly squared off to make the stalk, with a coloured ball shaped over my thumb into more of a cone shape, then tiny white balls flattened onto the top for the spots and top and bottom pushed together. If you work reasonably fast then the fondant stays soft enough to stick together and there's no need for sugar glue.


The Tinkerbell shoes were equally as easy. I rolled two sausages of green fondant, flattened the toe bit and then used a ball tool to "hollow" out the middle (by pressing it in three times and then rubbing backwards and forwards to smoothe). I then added small round balls of white on the front and placed the shoes in a V shape.


When I came to make the chocolate cupcakes I discovered I didn't have any the cocoa powder so I ended up using some of Sophie's milky way drinking powder. Not a good swap as the cakes didn't rise properly and burnt very quickly, although I did manage to salvage enough for the party.

This was my first real attempt at piping grass and the nozzle I bought was much finer than the one I'd tried on my cupcake workshop. It was a bit fiddly - too short and it didn't look like grass and too long and it just flopped over. By the end though I had figured out a technique of squeezing and wiggling the nozzle a little to start without lifting, which gave a good base and then lifting and stopping squeezing to get the perfect length grass - hard to describe and whether I'll get the technique again next time remains to be seen!


© 2011 Nicola Noble

Tuesday, 22 February 2011

Birthday cupcakes

It was my mother-in-laws birthday on Saturday and I toyed with the idea of using it as an opportunity to make a birthday cake but the week didn't really allow time for a full-on cake. So on Friday night, I decided to set-to and make some cupcakes instead (once the kiddies were in bed and hubby was at karate).

I made the cupcakes gluten free so that Jase could eat them too and they didn't turn out too badly. They were much drier in texture than normal sponge cakes and sweeter as I used rice milk instead of dairy milk but still edible. Strangely, they seem to have improved with time, becoming more moist in the cake tin!


I always find that I end up making twice as many cakes as the recipe states with the same quantity of ingredients - how does that work? I made about 18 normal sized cupcakes and 24 mini ones and baked the normal sized cakes in a deep muffin tin which helped stop them splaying too much. I experimented using my daughter's icing plunger to fill the mini cakes and it worked a treat. I have seen a bottle labelled as a cupcake filler and I think I need to look into this further as I do find it hard to not get cake mixture all over the cases and tins! I did notice on television the other day that they used an ice cream scoop (the one with the metal arm that scrapes the ball of ice cream out) so I might give that a go!

For decoration, I used some buttercream that I had stored in the fridge (note to self: useful to keep a supply ready made in case of last minute cake making decisions) and coloured half of it pink. I then used an open star nozzle that I recently bought and loaded pink buttercream in one side and non-coloured buttercream on the other side and piped some swirls. I had enough to decorate eight cakes.

I then cut out some plunger flowers in pale pink and a rose leaf in pale green fondant and arranged on the buttercream swirl. I finished off the flowers with a silver, pink and green edible ball in the centre of each fondant flower and a compulsory sprinkling of sparkle!

I laid them out on a plate and put a pink candle in the middle one. Glad to say my mother-in-law thought they were very pretty.

© 2011 Nicola Noble

Wednesday, 9 February 2011

Barbie princess cake

A friend of mine just asked for some tips on how to make a Barbie princess cake so I thought I would copy my reply to her here for anyone else who might be interested. I made this for my daughter's 4th birthday last year.

There are several ways that you can make the doll cake:

1. You can buy doll's head and torso from most cake decorating shops (made by Wilton) but personally I don't think they look that nice.

2. You can use a Barbie doll and either bake a lot of cakes to stack to the height of the doll, or you can take the legs off the Barbie (most seem to come off quite easily) so that you don't need to make it so high.


I found the following video clip really useful http://www.howdini.com/howdini-video-7075975.html.


I opted for the full height Barbie and made a selection of cakes - 3 medium width ones, 3 small width ones and one shallow one baked in a pyrex bowl to give the curve at the top. Another suggestion for the curve at the top is to use a doughnut or a bagel. I stacked them on top of each other and carved the outside of the stack to give a smooth slope. I think it looks like a dalek at this stage! I then cut a hole out of the middle of each one and re-stacked them with buttercream in between to hold them together. A trick I learnt on my cake decorating course, which would have been helpful, is to align cocktail sticks in each layer before separating for the buttercream. It is then easy to re-align the cakes in the position they were cut.

I used fondant to cover the cake (over buttercream) and had a front panel and then a skirt draped around the back and onto the front panel. That was tricky as it needed a huge amount of fondant to cover the sides and back - much more than you think. It would be significantly easier to cover the whole cake in coloured buttercream (see the video attached) but I just like using fondant.

I also made the bodice in fondant which was a bit fiddly and in hindsight I could have dressed the doll in normal Barbie clothes and then just covered the join with a ribbon (as I did) or fondant flowers etc.


A useful tip is to wrap the Barbie's legs in clingfilm before you put them into the cake so that they don't get covered in buttercream in the middle of the cake. Also my holes in the middle of the cakes were a little too big so I dropped a few cake off-cuts into the hole and pushed the Barbie into these to keep her steady.


© 2011 Nicola Noble