Pages

Showing posts with label star wars. Show all posts

Sunday, 26 May 2013

Mr Snowballs wanted a Star Wars Death Star cake

It was recently that time of year again when Mr Snowballs put in his request for his birthday cake with clear instructions that he wanted a Star Wars Death Star cake. I always argue that the sort of cake he wants should be reserved for "special" birthdays (such as my niece's 18th, mum's 70th, sister's 50th, best friend's 40th) or for our children's birthdays. As 40 something is neither, I always try to persuade him to be happy with a "norrmal" cake but it never works. So Star Wars Death Star is was ...
I didn't have the courage to make the whole cake into the Death Star but opted instead for a round cake with the Death Star on top. Mr Snowball informed me that if I wasn't going to do a "full size" Death Star then he also expected an Imperial Star Destroyer - he doesn't ask for much really!!

I have to admit that I had great fun making this cake and I was really pleased with how it came out.

The bottom sponge was gluten-free Victoria sponge with a mashed banana to help add moisture (gluten-free cakes are always so dry!). I covered the cake board in turquoise fondant and the cake in black fondant over Betty Crocker chocolate fudge icing (I seem to have an aversion to making buttercream after the gallons I had to make for Sophie's birthday). Then came the fun part.

I moulded the Death Star out of rice krispie treats (RKT); I have never used these before for my cakes but thought it would be easier than trying to bake a large cake ball. It was very quick and easy to do - I made the RKT before the school run one morning and by the time I came back it had set enough for me to start making the Death Star. Justin has some Lego Star Wars planets and I used one of these to mould the ball, greasing each half liberally before squashing the RKT in them. I read in a few recipes that it is a good idea to crush the rice krispies before mixing with the marshmallows and butter and I will definitely do this next time as there were quite a lot of divots on the outside of the ball. Also next time I will try to leave it longer to harden up, although the ball shape didn't distort too much.

I pushed the two halves of the soon-to-be Death Star together, emphasised the death ray hollow a bit more with my thumbs and then covered the ball in light grey fondant. I did this by cutting two circles of the grey fondant and placing over the RKT (I got the right size by using the Lego Star Wars planet as a guide), joining them across the middle of the ball. I then rolled out dark grey fondant and cut various shapes out of it: I cut circles to fit into the death ray hollow bit (marking it with the back of a knife before I put it on); a long strip to go around the middle of the Death Star; a circle cut into pieces of pie for the top; and almost-square shapes to go around the outside. I worked out that the squares needed to have angled sides to fit onto the ball. Once they were all on, I added random markings with the tip of a #2 icing nozzle and a knife and added tiny non-pareils (which was very fiddly!).

I made the Imperial Star Destroyer by stacking various cut and rolled pieces of fondant together, some white balls of fondant at the back with some silver balls and marking it with a knife. I also added a tiny Tie Fighter.


The finishing touches were Mr Snowballs' name in Star Wars style font in the turquoise fondant and copious amounts of sparkle to brighten the whole black/grey thing.
And the verdict? For someone who has high expectations, Mr Snowballs seemed suitably pleased with his cake and I had fun making it. Maybe next time I will be brave enough to tackle a whole Death Star cake ...

Monday, 14 May 2012

A bit of a Star Wars theme going on ...

There is a price to pay for living with a Star Wars mad 40 something year old: I receive e-mails throughout the year with photos of amazing Star Wars birthday cakes and the related anticipation of one such masterpiece appearing for his birthday. In previous years I have managed to "ignore" the constant trickle of hints but this year I was asked specifically to create a Star Wars cake.

The brief: just a simple Star Wars recreation of the battle of Hoth, complete with power generator and an AT-AT walker. Oh, and it should include Jelly-Belly jelly beans!! So nothing too complicated then? And all this with a week to do it ...

First step - scour the web for images for inspiration. Interestingly very few were stills from the film which surprised me, and most were other peoples' physical recreations of the battle scene (I should be thankful that my other half is not quite as nerdy as those people) which wasn't very helpful for my need to be as accurate as my skills allow (now who's the nerd?). I did find some useful images which helped formulate the design and off I went.

I made a 9" gluten free vanilla sponge and filled and coated with a lime and desiccated coconut buttercream (a flavour experiment which worked very well). I then covered the cake and board in one go with white fondant. Next step was to create the snowy crevasses, then make the power generator. I cut eight large thick circles in grey fondant, used a smaller circle cutter to mark the inner circle and added lots of texture before sandwiching them together into 4 pairs. I used two pieces of spaghetti to stand each circle upright and then pushed a long piece of spaghetti through the middle of the circles and cylinders of fondant between each circle. I finished off the power generator with some grey supports.
A standing AT-AT walker was not going to be possible in the timescale, as I would have had to make it in sections and let each section dry before putting it all together; so I opted for the fallen one which I think came out well. I also added a gun turret positioned in the snowy crevasses.
As I mentioned earlier, the brief included Jelly-Belly jelly beans and as I had't included these in the sponge itself I had to find a way to include them in the decoration. I decided to use white ones (incidentally these are coconut so fitted very well with the flavour of the buttercream!) and turn them into Rebel Alliance fighters. Smiley faces drawn with an edible ink pen, brown hats, snow goggles and a black gun and my guys were in place. Mr "I want a storm trooper and some more realistic (like in the film) people" didn't seem that impressed but they made me smile every time I looked at them so they were staying!
The finishing touches of his name in Star Wars writing (template created on the computer, printed, cut out and placed on grey fondant which I then cut to shape) and some edible snow like sprinkles and glitter and the cake was finished ...

As it was also Star Wars day recently (May the fourth be with you) and we had a packet of gingerbread dough in the fridge that the kiddies had persuaded Daddy to buy for them, we decided to use the fantastic Star Wars cookie cutters that we bought last year on our holiday in Florida.
I helped them roll the dough out and they both picked two cutters each and cut and plunged Yoda, Darth Vader, Boba Fett and a stormtrooper.
The baked gingerbread cookies came out very well and they enjoyed eating them. Perhaps another time (when they are a bit older) we might also have a go at icing them ...

© 2012 Nicola Noble: Please observe the rules of copyright and blog etiquette. If you use my ideas or images, please link back to my blog. And do let me know - I'd love to take a look.

Wednesday, 21 December 2011

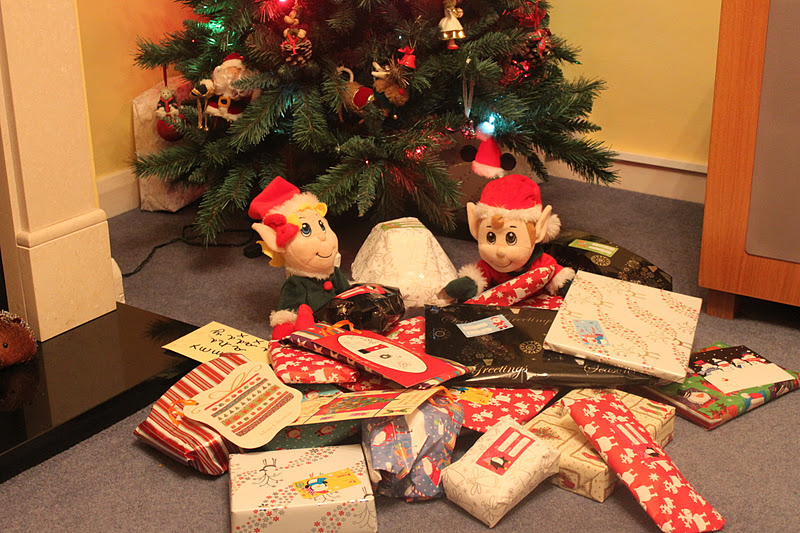
Elf update 2

Our elves have been very busy getting up to all sorts of mischief. Since the last update, they have:
- hidden in a cupboard after emptying all the tins and food out
- had a race on the police car and "green sheep" - and all to play for on the last race
- dressed up as Darth Vader and Obi Wan Kenobi and recreated the famous battle scene in our picture

- played Where's Moshi (Sophie's favourite game)
- pretended the bath was a swimming pool, complete with swimmers, goggles and toys
- propped the ironing board against the sofa, covered everything with white sheets and used a tray to toboggan down
 - had a tea party with some teddy friends, Santa and Frosty
- played We wish you a merry Christmas on the piano at Nana's house when we went for early Christmas

 - watched Christmas movies with popcorn, chocolates and lemonade
 - had a cotton wool snowball fight with one of the Santas
 - made paper snowflakes
 - played with all Justin's cars and set up a ramp for them to race down
 - made music with wooden spoons and pots and pans
 - built a huge tower out of wooden blocks under the kitchen table
 - took a balloon flight by attaching helium balloons to a basket
 - took all the presents out from under the Christmas tree
 - got the stockings out and fell in trying to put some chocolate coins in
Not long now until the big day when they make their report to Father Christmas and head back to the North Pole for a well deserved break ...

Friday, 11 February 2011

Lego stormtrooper cake v.2

I was asked some time ago by one of the mums at school if I would make a lego stormtrooper cake for her three year old's birthday today. I thought long and hard about it (would I have the time etc etc) and decided to give it a go. I worked out the cost of the ingredients and then plucked a figure from the air that I thought she might agree to pay, which she did.

Several weeks ago I coloured some fondant green (I was planning to do orange but discovered I didn't have orange colouring and didn't want to mix my own!), covered the cake board and left it to dry on top of my kitchen dresser. This made it much easier when I came to place the cake on the board this week - no annoying dents caused by finger nails catching the icing!

So on Monday this week I baked the cake and carved the shape and on Tuesday I covered it in white fondant, added the black fondant bits and piped black royal icing decoration. Then on Wednesday, I added the finishing touches of a belt and some lettering cut out of coloured fondant.

The cake was collected on Wednesday evening and I think they liked it!

I did say that I might get to do this cake again (following my first attempt during my cake decorating course) although I didn't think it would be so soon. I learned from my earlier mistakes and made the helmet much bigger this time and added a 3D belt. I also cut out the eye pieces from the white and dropped in some black pieces which worked well.

I also had a go at adding cake pieces to the head (under the fondant) to give some dimension to the helmet which worked well, although next time (did I say next time?) I will be braver and add more across the nose and mouth part to give it more dimension.

© 2011 Nicola Noble